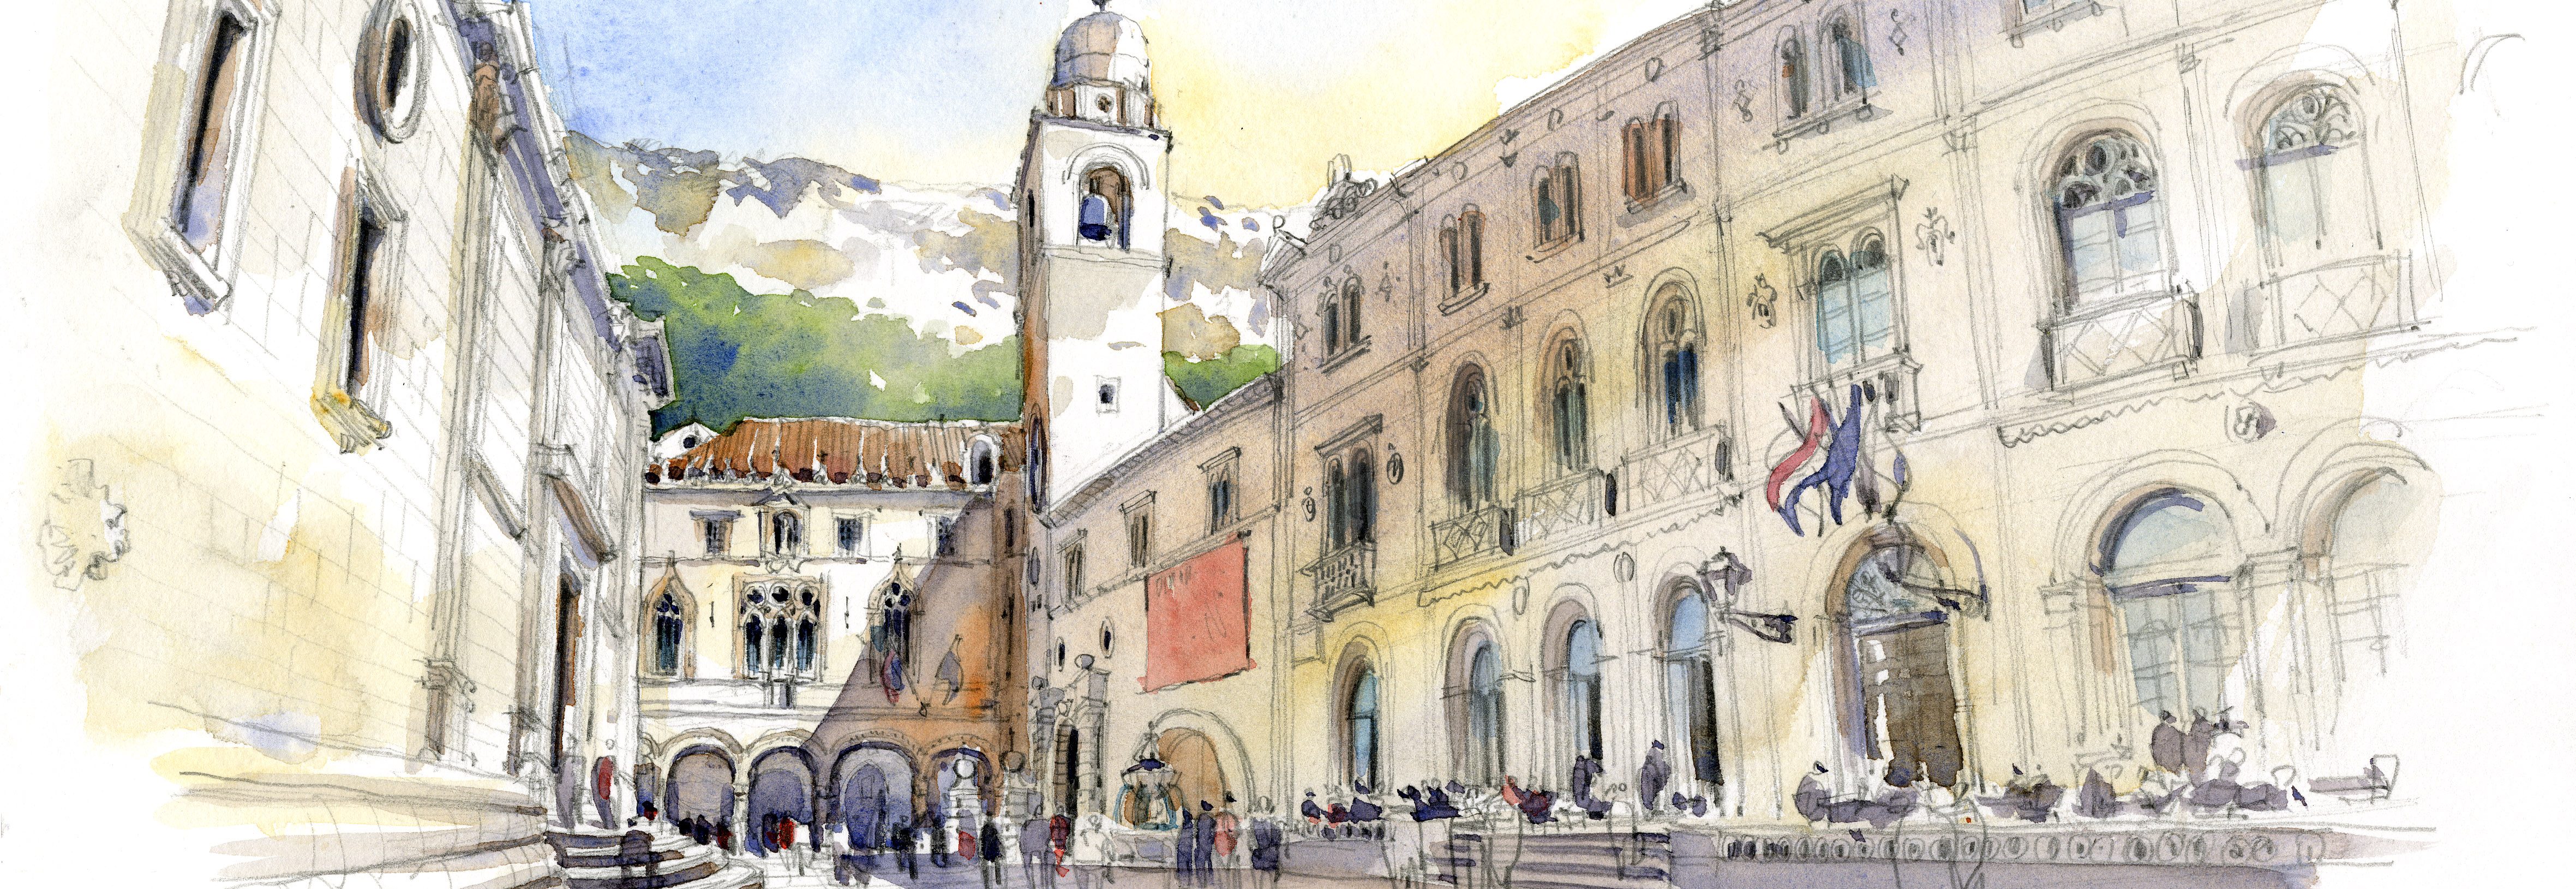
Anyone who has seen my drawings knows I love doing expansive, wide angle views. Here are a few recent sketches from parks in Seattle this summer. The sketchbook is a Hahnemühle Watercolor Book in landscape format.


Enjoy the summer!
Blog, Architectural Illustration, Sketching, Travel, and Workshops | Stephanie Bower, Seattle WA
Anyone who has seen my drawings knows I love doing expansive, wide angle views. Here are a few recent sketches from parks in Seattle this summer. The sketchbook is a Hahnemühle Watercolor Book in landscape format.
Enjoy the summer!
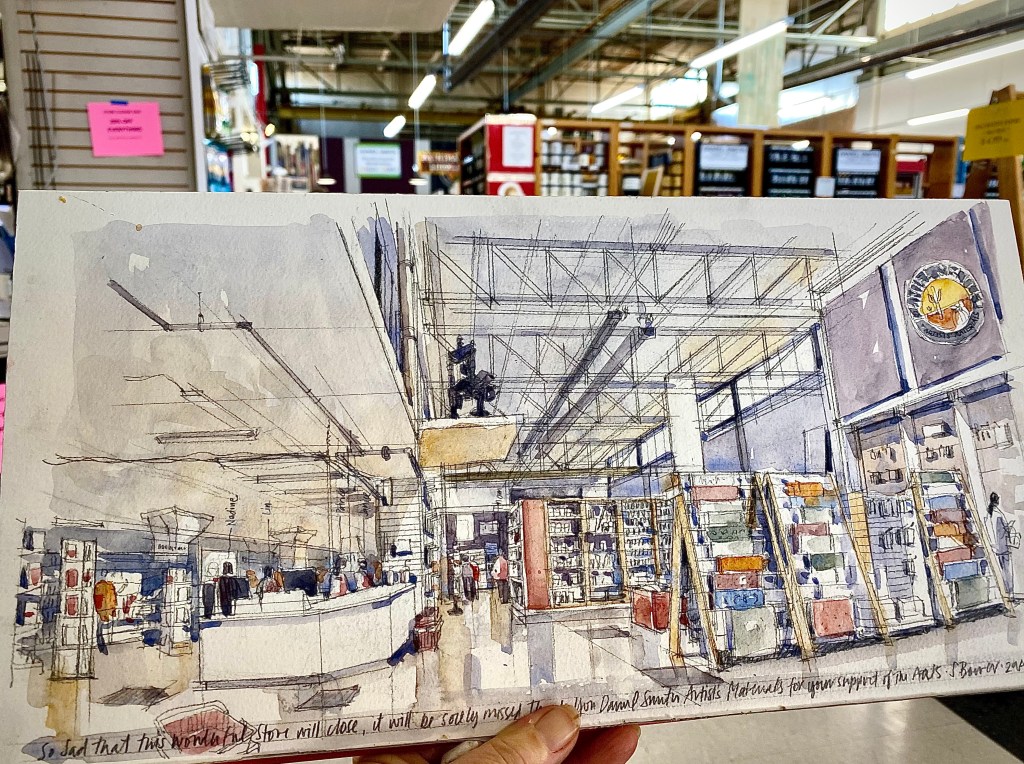
Join us to sketch at Daniel Smith Fine Artists’ Materials store in Seattle in the Sodo neighborhood, this Sunday, September 5 at 10am. We will sketch as a way to remember this wonderful store and say THANK YOU to the amazing staff. Please post your sketches, photos, stories, thank you’s to them at #thankyoudanielsmithstoreseattle on Instagram.

If you follow my work on Instagram (@stephanieabower), you know that my focus the past few weeks has been on launching the new book, 101 Sketching Tips! It’s so exciting and to be honest, very surreal!!
I also want to be sure to post practical and useful information to this blog and to use this as a teaching platform. To that end, this is a post from a few years back that got more views than any other on my previous blog. It shows the process I use to sketch each and every sketch I make, starting with reducing what I see to a few big shapes. (OK, shameless plug: it’s also one of the tips in the new book, “Tip 50: Sketch like an Architect. Start with the big shapes.” I think this post will show you what I mean, as it’s a different way of thinking compared to many folks who have an art background. More on that in a future post.
I LOVE to teach perspective because it’s something so many people fear, ignore, or fake, but there is no need if you understand a few simple principals.
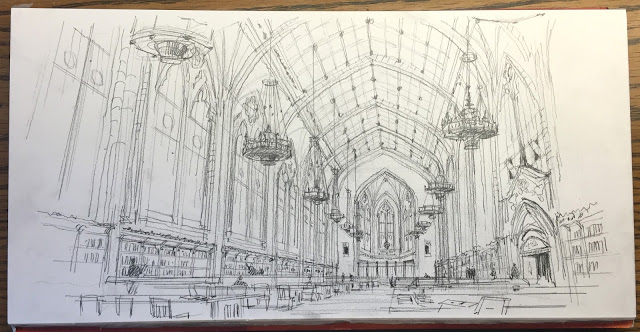
Here’s the view in Suzzallo Library reading room on the University of Washington campus in Seattle. It was a regular USk Seattle meet up event.

Step ONE, Looking at the view ahead of me, I simplify what I see to a very basic shape, starting with a rectangle. This is basically what I call the “shape of the space”, as if you were to slice the room like a loaf of bread, this is the shape of one slice. Here, it’s the shape of the end wall. I measure the height and width with my pencil, then I transfer that shape to my paper. I place this shape very low on my paper, as I want to be able to draw a lot of the ceiling.
Next I locate my eye level and mark it in my sketch by drawing a horizontal line all the way across my paper…notice how LOW my eye level is relative to the shape of the space drawn. almost on the floor. On the eye level line is the vanishing point, that tiny dot just to the right of center (not the smudge right above it!) That spot is directly in front of me as I face the back wall of the space, and it’s the point where the many receding lines will all converge, making this a one-point perspective sketch.

Step TWO–by drawing in the three elements of step one (big shape, vanishing point, eye level), I have everything I need to do this drawing accurately in perspective. I can use the vanishing point to start drawing in the big lines, the major architectural elements of the space. For this, I use a small plastic triangle, as it speeds things up to be able to snap accurate lines QUICKLY…

Step THREE– you can see I’m putting more of the bones in…the verticals represent the columns, or each structural bay of the space. I start to tilt the lines closest to me to exaggerate the sense of height.
Step FOUR– I start working on putting in the ceiling…big shapes get broken down into smaller shapes, then I break those shapes into even smaller shapes…that is how structure works! I also start to put in the chandeliers, as they cover up a good bit of the ceiling. Each one relates to a structural bay in the ceiling, and the lamps on the left relate to the lamps on the right.
Step FIVE– here is pretty much the complete line drawing. I try to build up the focus with detail and linework at the back, allowing the lines closest to me to fade out. I also added the book shelves, as that builds up the sense of activity at the pedestrian level and helps to ground the sketch. Notice how FLAT the tables are because they are so close to my eye level. Notice how details are just suggested, I don’t take the time to actually draw in every detail.

Step SIX–Color…I started by putting an underpainting layer of Yellow Ochre on all the areas I want to be warm, usually the surfaces that advance spatially or are in the sunlight (what little there was!) , making sure to intentionally leave lots of white, unpainted paper for sparkle and light. Then I layer in more colors…mostly grays, as nearly everything in this space was gray to beige…I also build up the color carefully at the end of the space, the focal point of the perspective and the sketch.
And here is a scan of the final image, complete with signature and reminder of where I was! I often lose a lot of the linework once I add color, which always makes me a little sad, as I LOVE the pencil work. It’s tough to hit that perfect pencil line –paint balance.

So there it is, beginning to end. It took about 1 hour and 15 minutes, sketched and painted on location. Paper is a Fluid watercolor block 8″ x 16″, Winsor & Newton watercolors, and my favorite Escoda Reserva size 10 travel brush. Also my 1″ angled synthetic brush for broad strokes in big areas at the beginning.
I hope you found this post helpful…if so, please leave a comment. And how does it look? Is the font size too big?? AND if you have ideas for what you’d like to see in future posts, just let me know. Thank you again for following this blog, and please also check out my workshops page…dates are being set now for 2020, Civita is already full!! I will post future workshops announcements on this blog first!
