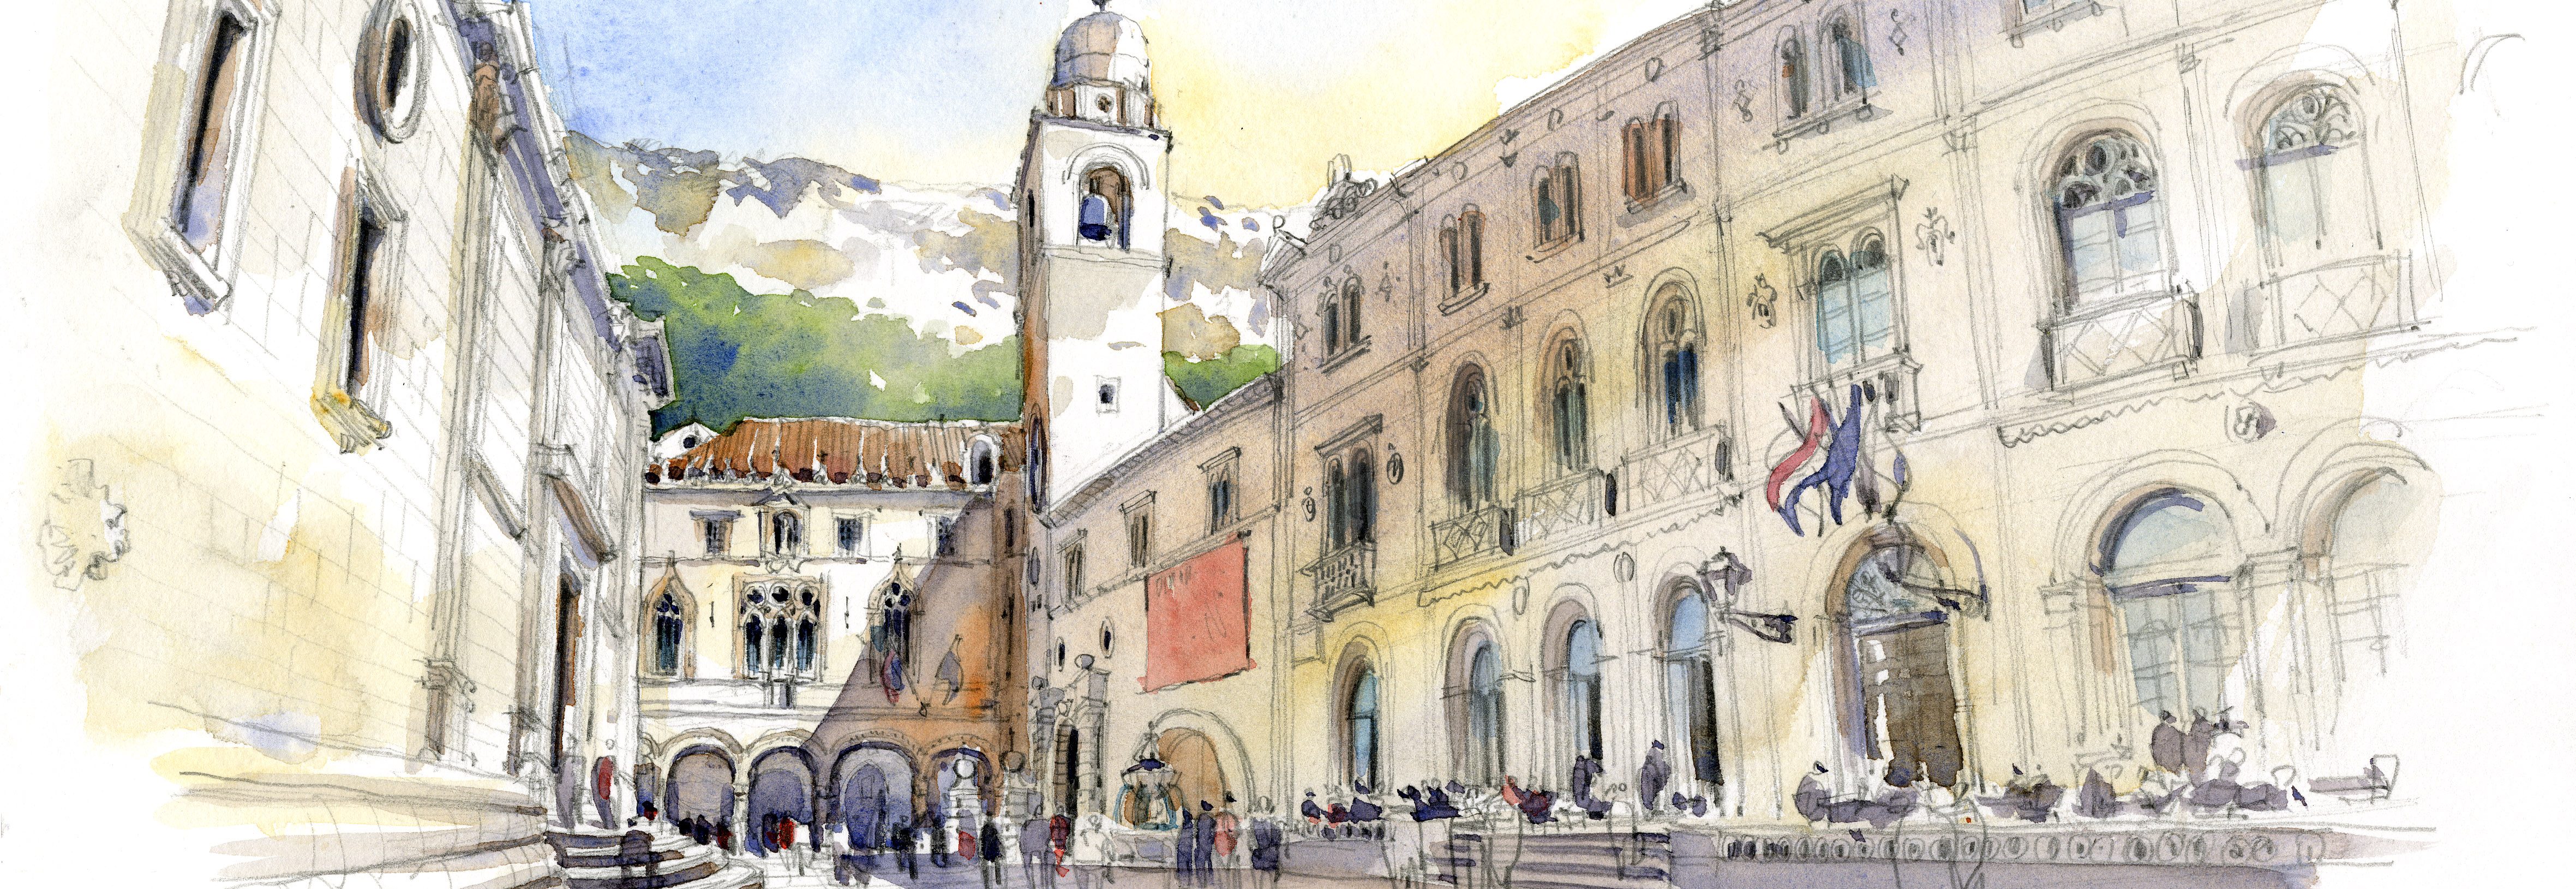

I recently abandoned my old blog to start this one, and I thought I’d share what may be the most viewed post from the former blog…the one, two, three steps to sketching an interior space, in this case, the University of Washington’s Suzzallo Library Reading Room. Most people think this sketch was done in merry old England, but no, it’s just a few miles from my home in Seattle!
I love to teach perspective because it’s something so many people fear, ignore, or fake, but it’s really not hard if you know what to look for. This space looks complex and overwhelming, but it’s not, and you’ll see that to start this sketch, I use the three simple steps I use in all my sketches!


Step ONE: Looking at the view ahead of me, I ignore all that amazing gothic detail and simplify what I see to a very basic shape, starting with a rectangle, then adding a sort of triangle on top of it. This is basically what I call the “shape of the space”, as if you were to slice the room like a loaf of bread, this is the shape you would see. It’s the shape of the end wall. I measure the height and width with my pencil, then I transfer that shape to my paper. I place this shape very low on my page, as I want to be able to draw a lot of the ceiling.
Step TWO: I use my pencil to extend the lines that are receding away from me to find the point where they intersect, my Vanishing Point. I mark that mentally in my view and physically on my paper. Because I’m sitting, look how LOW the VP is relative to that first big shape!! The VP also directly in front of me as I sit squarely facing the end wall.
Step THREE: Because the Vanishing Point lives on my Eye Level Line, I draw my ELL in the sketch, a horizontal line all the way across my paper. Look how low it is! I mostly do this because it is a really useful reference for many things, and it helps to stabilize the drawing.

And with these three simple steps, I have everything I need to do this drawing accurately in perspective!!! These are the basic foundational lines of the sketch, and they are the road map I will follow to draw in everything else. I can use the vanishing point to start drawing in more big shapes and prominent lines, the major architectural elements of the space. For this, I use a small plastic triangle, as it speeds things up to be able to snap accurate lines QUICKLY. Remember, once your VP is on your paper, USE IT to draw all those receding lines!

Step FOUR: You can see I’m putting more of the bones in…the verticals represent the columns, or each structural bay of the space. I start to angle the lines closest to me to exaggerate the sense of height.
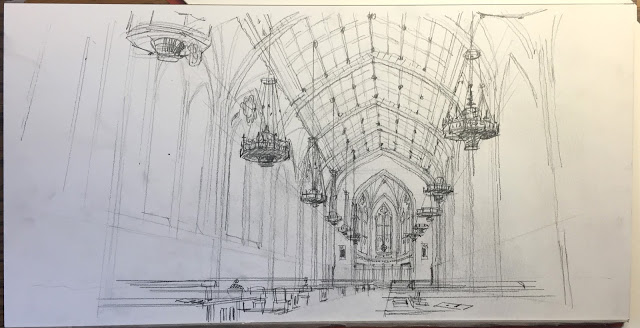
Step FIVE– I start working on putting in the ceiling…big shapes get broken down into smaller shapes, then I break those shapes into even smaller shapes…that is how structure works! I also start to put in the chandeliers, as they cover up a good bit of the ceiling. Each one relates to a structural bay in the ceiling, and the lamps on the left relate to the lamps on the right.
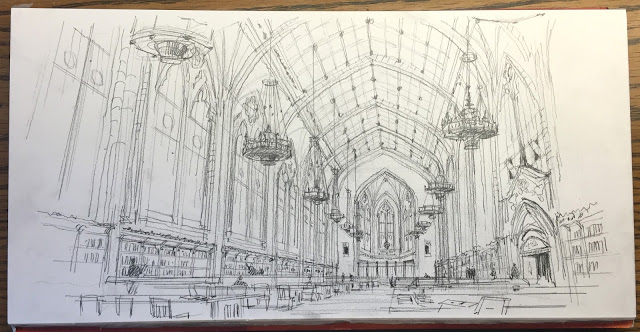
Here is a photo of the complete line drawing. I tried to build up the focal point with detail and linework at the back, allowing the lines closest to me at the edges of the paper to fade out. I also added the book shelves, as that builds up the sense of activity at the pedestrian level and helps to ground the sketch. Notice how FLAT the tables are because they are so close to my eye level. Notice how details are just suggested, I don’t take the time to actually draw in every detail.

Step SIX–Color…I started by putting an underpainting layer of yellow ochre on all the areas I want to be warm, usually the surfaces that advance spatially or are in the sunlight (what little there was!) Blue goes in at the very back to help that area recede. Then I layer in more colors…mostly grays, as nearly everything in this space was gray to beige…I also built up the contrast carefully at the end of the space, the focal point of the perspective and the sketch.
And here is a scan of the final image, complete with signature and reminder of where I was!

So there it is, beginning to end. It took about 1 hour and 15 minutes, sketched and painted on location with Urban Sketchers Seattle. Paper is a Fluid watercolor block 8″ x 16″ (sadly, no longer available), Winsor & Newton watercolors, and my favorite Escoda Reserva size 10 travel brush. Also my 1″ angled synthetic brush for broad strokes in big areas at the beginning. Similar to drawing from big shapes to detail, I paint from big shapes to detail too!
I hope you found this helpful!

Fabulous! I am so impressed with the beauty of your drawings. And to think you can do a drawing like that in a little over an hour. Thanks for sharing.
LikeLiked by 1 person
Thank you, much appreciated! And yes, I’m fast, but I’ve been doing it a long time!!
S
LikeLike
Very helpful, thank you. The perspective is still a “brutta bestia” for a beginner as I am. I’ll try to reproduce your delicious sketch. Best regards
LikeLiked by 1 person
Thank you, Federica…more posts to come! Best to you!
S
LikeLike
Stunning!
LikeLiked by 1 person
Thank you, much appreciated!!!!
LikeLike
Thank you so much! Really usefull.
Love your work!
LikeLiked by 1 person
Thank you so much!!!
S
LikeLike
I love this sketch! Thank you for your detailed explanation of how you created it. Very helpful and inspiring!
LikeLiked by 1 person
So nice to hear from you, Susie, and thank you!!!
S
LikeLike